The Ultimate Caramel Hot Chocolate

Everyone who knows me knows I'm a choco-holic!  I have been known to scoop chocolate frosting on a spoon and lick it like a lollipop!  A scoop of peanut butter and a scoop of chocolate on the same spoon...must try it!  Just sayin :)

Anyhoo....my girlfriend sent me a Caramel Hot Chocolate recipe that is soooo good!  It's rich and delicious but you seriously can't drink a huge mug because it will cause a sugar coma!  As the weather gets colder, we need to drink something warm and delicious.  Please give it a try.  You will not be disappointed!


Ultimate Caramel Hot Chocolate

Ingredients
  • 1/4 tsp fresh lemon juice
  • 1 1/2 cups granulated sugar
  • 4 1/2 cups room temperature milk (I used skim but any percentage should be fine)
  • 2 oz dark chocolate, finely chopped
  • 8 oz milk chocolate, finely chopped
  • Salt to taste (I used a big pinch)
  • Whipped cream
  • Caramel sauce
Instructions
  • In a small bowl, combine the lemon juice and sugar until the sugar is fragrant and damp
  • Place a medium saucepan over medium heat to preheat for a few minutes.  Once pan is hot, add the sugar.  Stir immediately and continuously.  Soon after it liquefies, it will take on a darker color.  Cook, stirring continuously, until it turns an amber color, thus making caramel.
  • Stream in the milk while continuing to stir.  The caramel may seize and form small chunks of sugar, but continue to stir the mixture.  When the milk is hot, the caramel will have melted and will be a smooth liquid.
  • Bring liquid to a simmer (small bubbles forming along sides of pan) remove pan from heat.  Do not let the liquid come to a boil.  Add the chopped chocolates to the pan and whisk until mixture is smooth and chocolate is melted.  Add salt to taste.
  • Serve with whipped cream and caramel sauce!  ENJOY!


In a small bowl, combine the lemon juice and sugar


Combine until sugar is fragrant and damp


Chop dark and milk chocolate


Add the chopped chocolates to the pan and whisk until mixture is smooth and chocolate is melted


Serve with whipped cream and caramel sauce!


Enjoy and stay warm :)


Linked up:
[Sweet Bella Roos] [Posed Perfection]

Vintage Desk Restoration

My middle son has been needing a desk for his room.  I had been looking for quite some time and because his room is small, it needed to be a small one.  Although, this may be a problem since he is 6 feet tall now!

I found one a few weeks ago at the thrift store and when I saw the price, it was done! It wasn't in the best shape and it had that old, basement smell but I knew I could give this oldie but goodie new life. For $6.99, how could I not?


A few things about my awesome comedian (middle son):  he is stylish, loves bold color, knows the best card tricks (even adults get freaked out how good he is), enjoys decorating AND keeps his room clean and neat all of the time without a word from me!  I know what your thinking...but really, I'm telling the truth!  I knew I could be daring with the color for his desk, so I decided on Benjamin Moore Orange Burst!


I sanded, filled in the dings and blemishes with wood putty, then lightly sanded before priming with my fav primer:


I had Home Depot color match a quart of the Benjamin Moore Orange Burst.  
Notice I use foil to cover my paint tray so I do have to buy a new tray for each project!

At one point while painting, I thought I smelled oranges.  True story!


It really is a beautiful color.  BUT....I needed 4 coats! Patience is not one of  my strongest attributes so I ended up working on multiple projects at the same time (many posts to come). Then finished up with 2 coats of Poly, sanding in between.


I painted the accent molding orange as well.

Even though the desk is working for him for now, I will have to keep an eye out for something larger because it's just too small for him.   I tried :)

Console Table Restoration - Ruby Ring Red

A friend, who had a boat load of stuff to get rid of, was getting ready to have a yard sale and asked if I wanted anything before the sale.  I immediately saw her console table and wondered what the heck had she been doing to it!  It had been a hand-me-down through her family, seen it's fair share of bumps and dings and she was done with it! She didn't think anyone would want it because it was in such bad shape so she was going to put on the curb as trash!  Can you believe??  Naturally, in my head I was doing the happy dance but I said very, very, very enthusiastically .... Ummm...I'll take it!  

Ohhh yeah...I'm going to rock this freebie :)


I started with a good sanding.  Not even joking...A GOOD SANDING!  I didn't want to ask what the black gloopy, hard thing was so I sanded the heck out of it!  And wouldn't you know it, because I'm working on multiple projects at the same time, I forgot to take pictures of the sanding and priming (as always, I prime with Zinsser Stain Blocking Primer).


 Oh well...on to the good stuff :)

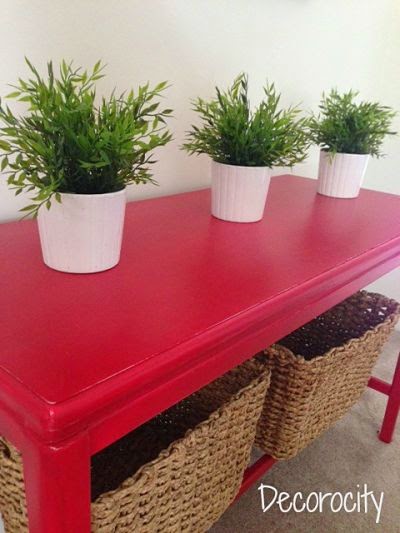
I knew that I wanted this console table to be a distressed red table.  The number of red paint colors is C.R.A.Z.Y!   It's quite overwhelming, so after looking at the upteen number of different red paint swatches and scouring the blogs, I came across this post showing different reds on different projects.  It helped me narrow my choices and went with Behr Ruby Ring.


 I knew going into this project I would need at least 3 coats.

1st coat

2nd coat

3rd coat

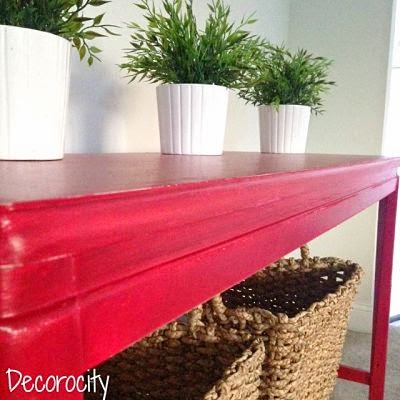
I really like the depth of the color of this red. I wanted a distressed look so I was going to add a glaze once I finished painting but I like the way it looks now.  It turned out exactly as I imagined.


I lightly sanded the areas the paint would normally have been worn down. 


I have been waiting for the right table to go underneath the art on the wall.  When the sun fills the room, the red looks bright.  But at night, the red looks close to the lighter red in the paintings.  I think eventually I will put a dark glaze on it to warm it up.


The thermostats in this house are in the wrong spots :(

Linked up:

Related Posts Plugin for WordPress, Blogger...