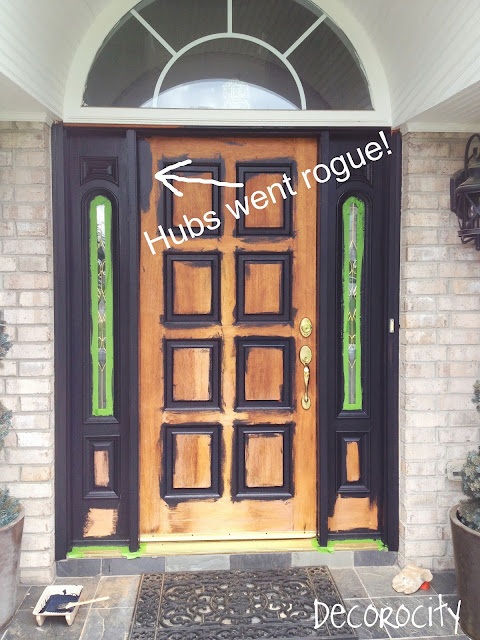
After much thinking and many glasses of wine, I finally decided to paint the front door BLACK!
How it went down:
I'm really excited and extremely nervous because what if it looks horrible or
THIS happens. I'm not joking when I say I got palpitations reading Allison's "
epic fail"! I would have needed a tequila drip line if that had happen to me! Therefore, because I'm not exactly besties with sandpaper, frog tape and brush lines, I have scoured the blogs for all "don't do what I did...learn from my mistakes" to hopefully not have their mishaps happen but to give me a beautiful result! Say a prayer :)
Let's look back at this sad, sunburned, old (it's 5 years old), diamond in the rough!
 |
| Embarrassing doesn't begin to describe how I feel...seriously what was I thinking to wait so long to paint it! |
I decided to go with Lowe's Valspar Ultra in Satin -
The Ultimate Weather Defense. The afternoon sun hits the front of our house and the Georgia sun is H.O.T...hot..hot as Haiti's!! I hope this paint is the ULTIMATE, if not, this door is going to need serious laser treatment with all the UV's it gets ;)
I used a Purdy roller and Prudy 1.5" angle brush.
I am not the "gotta tape stuff" kinda girl but rather a"cut-in and hope I don't have touch ups" kinda girl. HOWEVER, after reading so many blogs about how to best paint the front door, the wise one's suggested to use Frog Tape and I would thank them later! I was a hot mess by the time I finished taping the windows and the bottom. I must say it was well worth the time invested in taping :)
I then started painting EXACTLY as instructed :)
As I was painting, Hubs came out and asked if I wanted help. So, of course, I said sure and for him to only paint the top of the sides and I would paint the bottom but do not touch the door. I told him there is a specific way to paint the door and it has to be done that way. He looked at me and asked if I had been drinking! Hello...I will be if this doesn't look right! I said,
honey I do not want to have to repaint, sand, or buy a new door, so we have to paint in the exact order. Lo and behold!!!! I looked up and saw he had started painting the left side of the door!
Seriously! I yelled NOOO...STOP! He almost dropped his paint tray (my palps started and I almost dropped my tray). I said,
DUDE we just talked about the proper order to paint this door! He told me I must be dehydrated.
*Thank you, I will take it from here babe...mmmwwahhhhhh*
It was so hot while I was painting and the sun was now in front of the house. I just wanted to get 'er done! Thank goodness the sun went behind the clouds and finally it was a little cooler. NICE. But then I noticed the sun was behind clouds for a long time. hmmm let me see....
 |
| this is not funny .... for real! |
Oh yes... it's coming! We have had so much rain in the last few weeks (like flooding amounts of rain), you would think we were in Seattle. I had to hurry up and paint as fast as I can but taking care to not MESS up!
 |
And in an instant, there was sun...crazy weather! ahhhhhh (1st coat done!)
|
Because I had a tough time taping the windows, I did not tape the hardware. I know I can definitely cut-in around those babies!
 |
| I can do this...I can do this |
|
 |
| guess I should have removed the hardware :( |
|
I have to say I love our new door! I'm just upset I didn't paint it the minute we moved in! I'm in love...serious love :) Thank you to all the bloggers that gave detailed instructions and shared their unfortunate mistakes. It means the world to me!
.jpg)
.jpg)

.jpg)


